Attempting to divide a large Dendrobium taberi (Dendrobium speciosum var. hillii or Thelychiton tarberi) for the first time can be daunting but with a little instruction and guidance it is not quite as hard as it seems. If left, these plants just get bigger and bigger ……

… and if you would like to see a magnificent one that’s in flower, click here.
Here is my first time attempt at dividing a Dendrobium tarberi.
- First the pot was allowed to dry out a bit – no watering in the days before.
- A drier plant is easier to divide.
- All the necessary equipment was assembled before starting

Assembled equipment including Snail repellent, Bleach for cleaning pots & equipment, wettable sulphur for putting on the fresh cuts - All equipment to be used was disinfected.
- For though tough, the plants will be placed under stress making them vulnerable to the risk of infection.
- The pots were washed in bleach as per instructions on the container, including the wearing of gloves.
- The plant was removed from the pot by
- by giving the pot some good knocks with a mallet. This loosened the plant and made it easier to remove without damaging the pot
- and then it was given a good shake to remove the loose potting mix
- Next the plant was examined for areas of natural cleavage which were then pulled apart.
- This is the place to start dividing the plant.
- The plant was still quite big so then tried using a mallet to try and loosen the plant and find more natural cleavages but wasn’t successful
- The whole plant was picked up and dropped from chest height several times
- This finally caused the plant to split
- As the plant started separating two techniques were employed

These plants are tough – no need to use kid gloves - An axe and mallet were used to lever the larger divisions
- Smaller divisions were twisted by hand
- Throughout the process old roots were pulled off or cut away
- Old roots are soft, spongy and dirty looking
- New roots were white and firm to touch – see photograph above
- Once the initial canes were divided they were examined for further division This decision can be a case of personal preference.
- In the picture below this section could have been split in half but it was decided to leave as one piece

- In the picture below this section could have been split in half but it was decided to leave as one piece
- Next the split canes were well dusted with wettable sulphur
- To make this easier the sulphur was put into a stocking and used like a powder puff

- To make this easier the sulphur was put into a stocking and used like a powder puff
- Before commencing the potting on, many of the dried white sheathes on the canes were removed
- This can be a source of stagnant water collection resulting in rotting or infection
- Finally it came to potting on. A mixture of two types of orchid potting mix was used – Orchid Mix with fertilizer and Orchid mix with 8 – 18 mm bark
- The reason was that the mixture needs to be open to allow air movement. Normal potting mix would be too compact. Dendrobium are epiphytes not terrestrials but they can be grown in pots.
- The canes were placed upright in the pot and the mix placed around.
- As these are heavy plants, stakes were used to secure the canes upright
- Each plant was then labelled
- An important process so as to not get them confused with other plants – many can look similar
- The name and date were written on lollypop stick
- Finally the pots were given a light fertilizer, less than a teaspoon, and watering, then sprayed with Escar-go, a copper spray a snail and slug repellent.


Other grower may do things a little different from what is describe here but this is the method that was shown to us.
Lesson – breaking up is easy to do even if it is hard work, but worthwhile hard work.

PS – It did take three of us to do the one pot and so I would like to thank Jan and Sandra for their help.
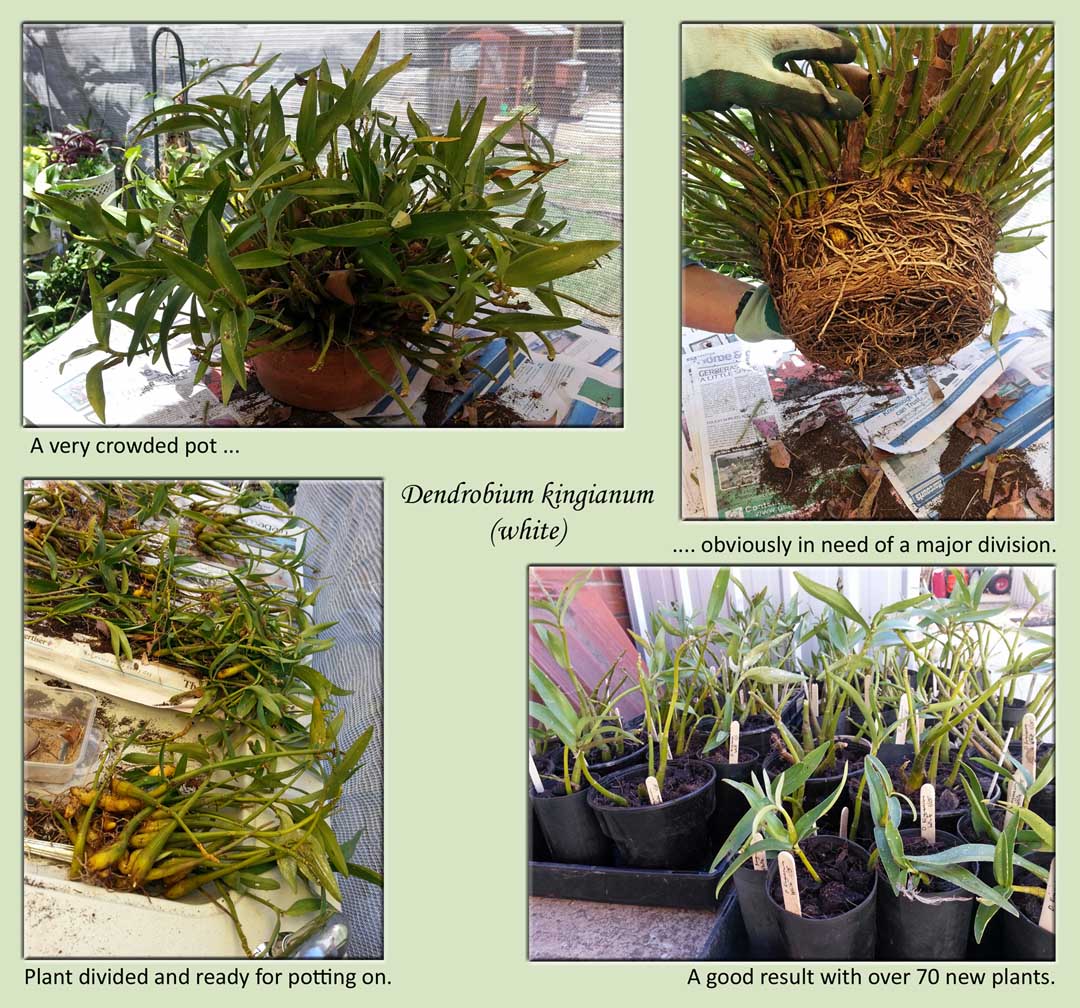
PPS – Encouraged by how easy it was to do, the following week two of us divided two other Dendrobium – D. speciosum and D. kingianum (white) but we only took pictures of the D. kingianum and to see what it will look like when it flowers, click here.