
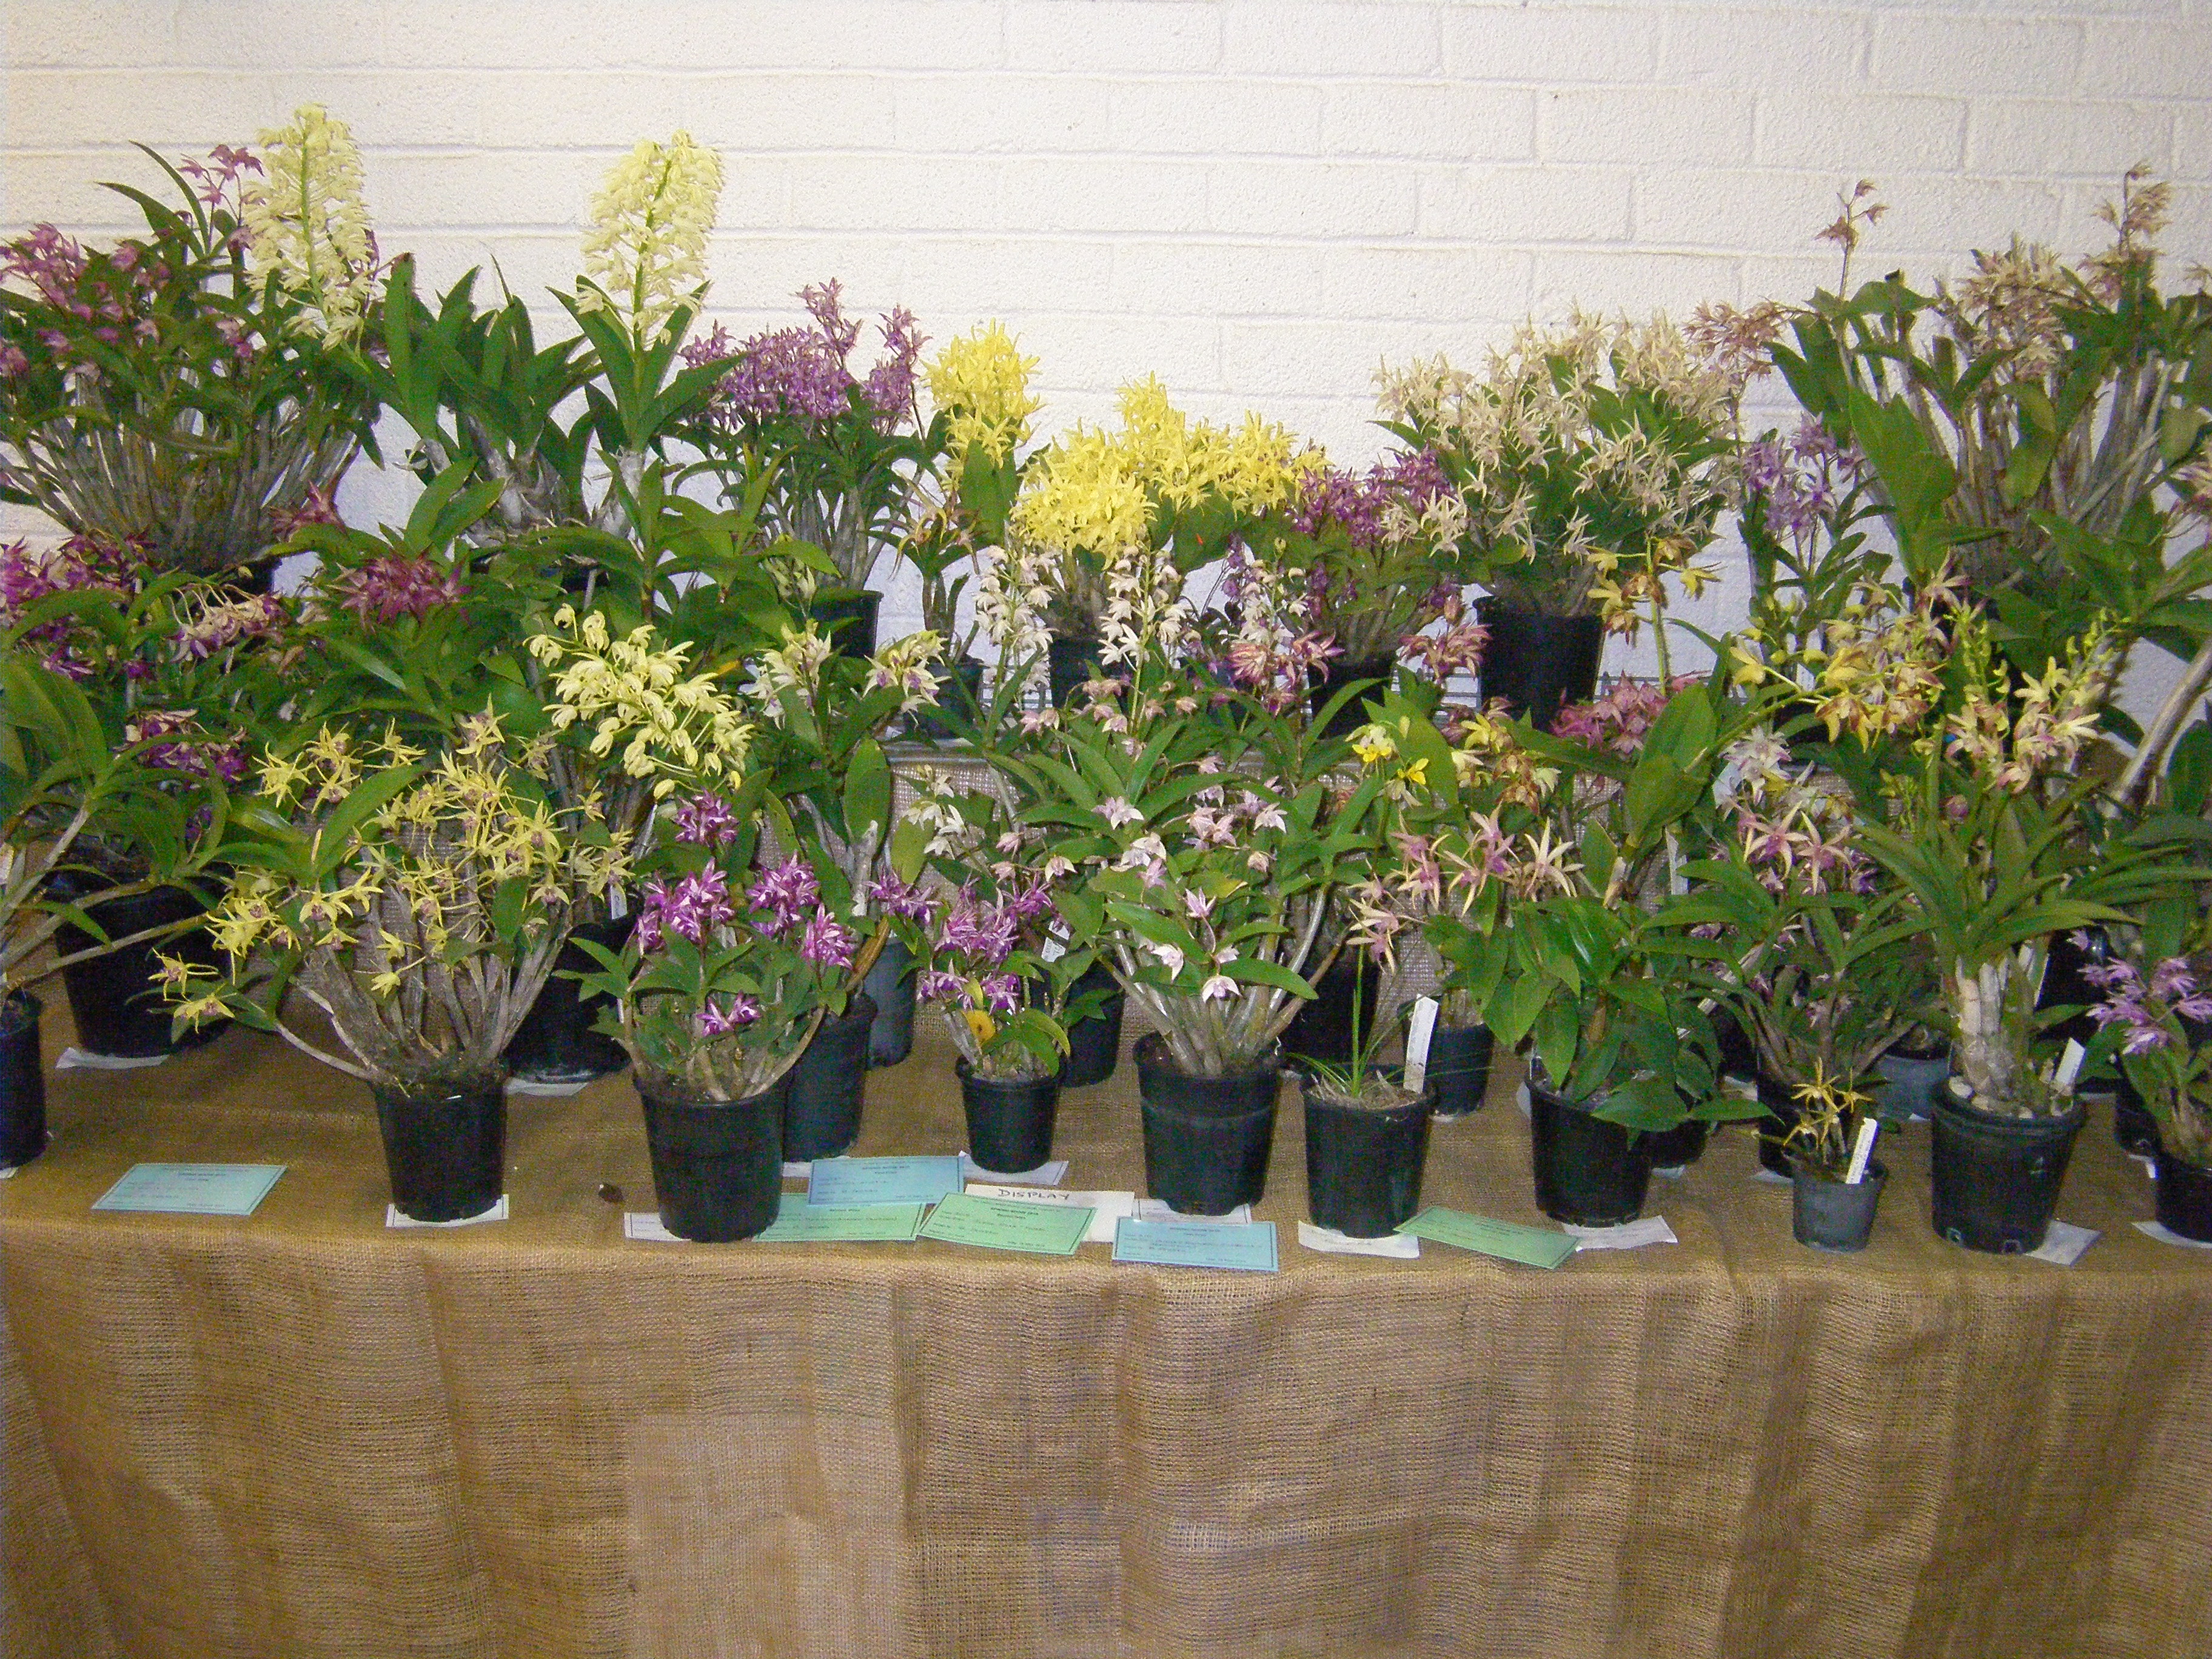
Last year, UniSA second year media students were required to produce a short documentary about a local organised. Three of their students, Vanessa Rossi, Tayla Elliot and Emma Sullivan, chose to produce a video about the work of the Native Orchid Society of South Australia. And for this we thank them. It was interesting working with them and they learnt a few things about our bush gems – namely that they are not big and showy!
Some adjustment needed to be made to the original video, but it is now available for viewing
Category: Growing Epiphytes/Lithophytes
2019 SARCOCHILUS OPEN DAY & BBQ
WESTERN ORCHIDS / LABORATORIES
333 Ackland Hill Rd, Coromandel East, 5157
OPEN DAY & BBQ Saturday 23 November 2019 between 10:30 and 3:30
TEA & COFFEE ON SITE – BRING YOUR OWN DRINKS & CHAIRS
Members of all orchid clubs welcome
Western Orchids / Laboratories is run by Kevin Western and the main business is to produce a wide range of flasks containing quality plants with decent root and top growth such that they have the maximum probably chance to thrive after deflask for our customers.
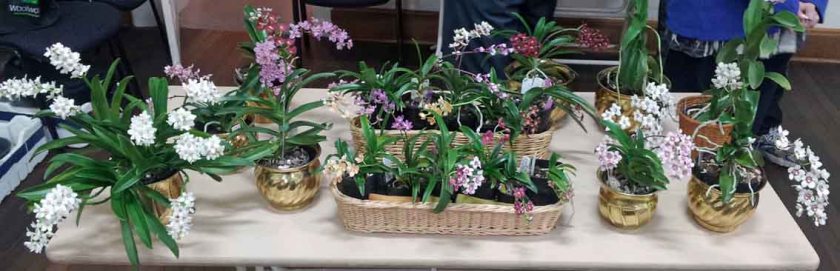
Come and see whit is probably the largest collection of Sarchochilus orchids in South Australia with a significant proportion of them in flower at the moment.
The property features a Tissue Culture laboratory where the seeds are sown, where the clones are generated and where the final replate flasks are housed until ready for sale.
Western Orchids / Laboratories was started back in 1995 when we were at at Coromandel Valley. the current property was purchased in late 1995 and the laboratory, glass house and first shade house built and commissioned in October of 1996.
Visitors will be able to see the laboratory as well as the glass house and shade houses.
I (Kevin Western) am a plant breeder and constantly seek to buy and to breed better orchids for the orchid public of Australia.
I attend several interstate orchid fairs each year where a significant proportion of my sales occur. I also have a website (https://westernorchids.com.au/ ) and a string of regular customers who regularly purchase flasks and / or tissue culture medium from me. Many of my flasks are sold to other orchid nurseries who raise them in pot or on mount and then on-sell to the orchid public.
There will be Sarchochilus seedlings and plants available for sale AND I would like to sell as many of them as possible to make room for the next lot of deflasked seedlings to be reaised in their place and grown to flowering size when I will again choose my breeding stock from them.
Because I neet the room to grow them up I only want to keep the current breeders and unflowered seedlings.
THE REST WILL BE AVAILABLE FOR SALE.
Many plants at ridiculous prices – $5; $10; $15 & $20 with a few that just didn’t qualify as breeders individually priced to match their quality.

Sarcs – Growing without the Nonsense!
The following article is from Volume 42 Number 10 November 2018 Native Orchid of South Australia Journal. Marg Paech, editor, has written an excellent summary based upon Kevin Western’s detailed notes which he has kindly supplied and is available here.

Kevin Western, this month’s guest speaker didn’t hold back. He exposed some of the myths pedaled by good growers who misinform naive newbies or other growers.
Until about 1960 or thereabouts, the only Sarcochilus orchids that existed were in the bush where they had evolved and grown for all time and the only orchids that existed in people’s collection were bush collected so therefore all were species. No doubt, at times in the bush, there were hybrids made accidentally by pollinators or by other natural chance events. 1968 was the first time we can say for sure that there were hybrid Sarcochilus in existence.
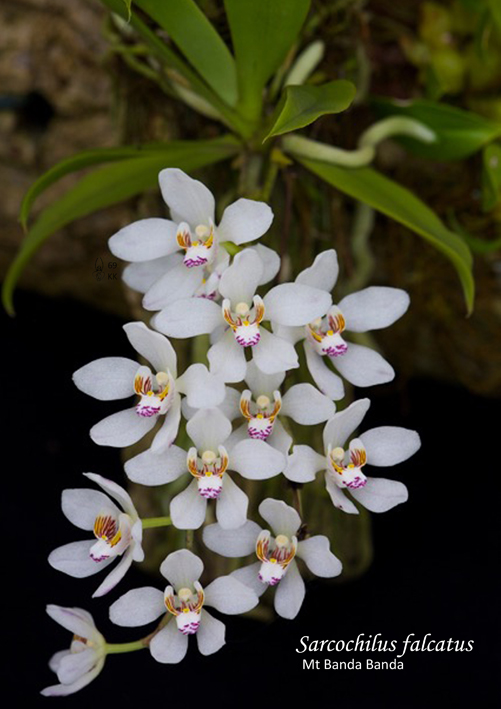
Sarcochilus are native to the east coast of Australian and to Tasmania. There are about 25 species recognized and the number has grown recently with the splitting off of S. minutoflos.
The easiest species to grow for hobbyists generally are Sarcochilus hartmannii and S. fitzgeraldii. From their physical appearance and flowering time, flower shape and nature, it can be seen that they are closely related. Their natural environment can be matched in a pot by using a range of different potting materials (either solely or a mixture of) – suitable size pine bark, Perlite, cut up tree fern fibre, rice hulls and or sphagnum moss. Remember, they will grow on rocks, rubble or on various types of natural and artificial mounts!
Humidity
Sarcochilus grow naturally where they do because of the balance between the suitable amount of reliable moisture in the form of rainfall and or dew; and those unavoidable moisture losses due to sun, heat and wind. We can replicate that by just giving our Sarcochilus regular waterings, and ensuring that our potting medium is coarse enough. An extra layer of shade in really hot summers can help, and by reducing wind movement by the location and provision of shade houses, we can create suitable growing conditions for our orchids. Frequent watering is the trick – retirees by hand watering and workers by sprinklers, misters on timers or thermostats or similar. Air movement is a must but here in sunny Adelaide we get plenty of it and in fact, too much movement has a drying effect.
Potting Mixes
The best mix for Cymbidium (sic)* orchids is a coarse, non-retentive medium – far better because they can be watered frequently – even twice a day or far more, and plants do far better. Even standing the pots in water during summer works wonders! Trial and error is the best way to learn, as experienced by Kevin.
Sarcochilus can be potted into clay balls used by hydroponics growers. Good, clean coarse pine bark also is fine.

Watering and Fertiliser
It is generally considered impossible to grow plants on mounts in shade houses etc in suburban Adelaide. Yet another myth! They grow exceptionally well, a fact that Kevin found out thanks to Kris Kopiki. It is more difficult to overwater a plant on a mount.
There are lots of myths about fertilizing. Using far more dilute fertilizer applied to a dryish mix and roots, Kevin has found to be far more effective. His policy is to fertilise weakly and frequently. Despite the hundreds of fertiliser options and brands available – they all are only better or worse
sources of those few essential substances which an orchid requires. The seaweed extract products are probably good as they seem to promote root growth. Keep it simple is the best option.
Summary
Our Sarcochilus have roots designed to grow attached to rocks or branches or twigs and are designed to catch and hold quite small water opportunities and they may benefit from drying out from time to time and for periods of time.
Coarser and less water retentive media are advantageous by enabling the roots to experience some drying as would occur in nature.
We are then able to water and fertilise far more often and our plants will grow better. We need to better understand what our preferred fertiliser’s strengths and weaknesses are so that we can better supply their needs more simply, more effectively and at lower cost.
Regular watering, wind control and shade improvement to avoid drying stress is far more sensible than hoping to reproduce and sustain high humidity.
Thank you Kevin for such a candid, down-to-earth talk full of good advice for growers
*In Kevin’s note he discusses his experience with Cymbidiums but Sarcochilus can also be grown with a similar medium.
2017 October Cultural Notes
Steve Howard’s October Australian Epiphytes and Terrestrials Orchids Cultural Notes for Adelaide’s conditions.
Epiphytes
- October sees many native epiphytes finish flowering and shortly it will be the best time for potting on and division as new growths are due shortly. The earlier you start, the more time the orchid has a chance to initiate new growth and mature it in time for next years flowering.
- Remove spent flowers as leaving them on the plant in wet and humid conditions leads to rot caused by botryitis.
- Be aware that aphids are in big numbers now and will cause grief to flowers and new growths.
- Malathion at 1 ml/ litre of water will knock them out.
- Repeat fortnightly for 6 weeks to break the breeding cycle.
- Apply lime to plants grown in bark to counteract acidity.
Terrestrials
- Most terrestrials nearing completion of the season.
- Start drying off once leaves start yellowing. Keep water up to those staying green.
- Additional shade helps now as suns intensity increases
2017 September Cultural Notes
Steve Howard’s September Australian Epiphytes and Terrestrials Orchids Cultural Notes for Adelaide’s conditions.
Watering
Epiphytes
Mounts daily. Generally moistening roots only.
Pots weekly. Small pots twice weekly depending on weather.
Terrestrial
Pots can dry out faster on warmer days so keep a watch on conditions. Note some terrestrials will commence summer dormancy towards the end of the month. Those that do show signs can have water reduced somewhat.
Feeding
Terrestrials
Weak organics like Seasol and Powerfeed applied in low doses can benefit colony type greenhoods.
Epiphytes
Low nitrogen always best for native epiphytes. Top up epiphyte pots with dolomite lime and a dash of blood and bone. Seasol a useful additive now as new seasons root start.
Pests and Disease
Epiphytes
Botrytis will rot new buds in cold damp weather as fast as it attacks new growths from now. Aphids will increase sharply this month and favour new growth and spikes. Pyrethrum sprays eco friendly and work well, so does a hose but dry spike straight after.
Terrestrials
Some terrestrials will rot this month if conditions have been too wet or stagnant over winter. Note this for next season and add more drainage if this has been an issue.
General Advice
Keep flowering plants under cover to enjoy as can be rather wet and cold as well sunny and warm this month. Start repotting and division once flowering finished to give plants longest possible time to establish over new growing season.
Time to get busy and take note of the jobs of potting and division to be done. Sept and October are the best months to work on the collection before the hot weather sets in.
Do you have small slugs and snails in your pots? Get a cheap coffee grinder and grind up your snail pellets. Sprinkle in the pot and water them in. Bite size for micro slugs and the baits get right into where they hide.
[Terrestrials are not repotted until summer – Steve will have more on that later]

2017 August Cultural Notes
Steve Howard writes cultural notes for Adelaide conditions. These are his notes for August; for both epiphytes and terrestrials.
WATERING
Mounts daily.
Pots weekly. Small pots twice weekly depending on weather. Drier conditions for hot cold types. Terrestrial pots can dry out faster on warmer days so keep a watch on conditions.
FEEDING
Epiphytes: Recommending feeding towards months end as days lengthen. Many plants in strong spike growth and flowering now.
Terrestrials generally don’t need to be fed although weak organics like Seasol and Powerfeed applied in low doses can benefit colony type greenhoods.
PESTS AND DISEASES
Epiphytes: Botrytis will rot new buds in cold damp weather as fast as it attacks new growths from now. Aphids will increase sharply this month and favour new growth and spikes. Pyrethrum sprays eco friendly and work well, so does a hose but dry spike straight after.
Some terrestrials will rot this month if conditions have been too wet or stagnant over winter. Note this for next season and add more drainage if this has been an issue.
GENERAL
Epiphytes: Keep flowering plants under cover to enjoy. Soon will be the time to start thinking about re-potting and division as spring nears.
Keep flowering terrestrials out of strong winds and heavy rains as flower stems on some varieties are quite weak when grown in cultivation
Additional:
Later August will produce some warmer drying days as spring nears. Ensure small pots and plants don’t dry out at this time. Good time to check out seedling lists and prepare orders to ensure your plants arrive at the commencement of a new growing season.
2017 July Cultural Notes
Steve Howard regularly writes orchid cultural notes for various orchid clubs in South Australia. His notes are tailored specifically conditions in Adelaide. The following are his notes for both epiphytes and terrestrials for the month of July.
Epiphytes
- Water mounted native epiphytes daily; pots weekly and small pots twice weekly depending on the weather. Hot cold types require drier conditions. Generally none to once monthly for me.
- Colder weather slows down their metabolism in winter. Foliar feeding is beneficial.
- Keep water out of new growths to avoid rot. Clones prone to this need to be moved under hard roof cover to keep drier.
- Check under leaves for scale.
Terrestrials
- Weed pots as the weeds appear and ensure that they don’t get too wet.
- Remove rotted growths.
- Start baiting for slugs and snails as spikes emerge from protective sheaths.
- Provide hard cover during wet weather to stop botrytis spotting and rotting out spikes.
CONTROLLING SCALE ON NATIVE ORCHIDS
INTRODUCTION
There is a lot of information on the web about treating scale, some relevant to a specific country, some accurate, some not and much that is contradictory.
The following information is based upon treatment methods that the Native Orchid Society of South Australia (NOSSA) growers have found most effective.
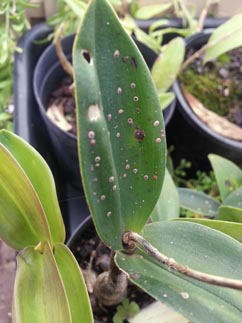
WHAT IS SCALE?
Scale are tiny sap sucking insects of which there are several species in Australia. The female adults build a shield-like cover for protection. The shields are often brown but can be white or red. The shield can be up to 3mm in size. Once a shield is built the adult does not move about but stays in the one position. Ants farm scale as they exude a honeydew sap, a food source for the ants.
Immature scale or crawlers do move about. These can be a different colour from the adult eg juvenile brown scale can be yellow, other species can have grey juveniles. They are lightweight no more than 1mm and easily windborne.
The life cycle is short, and for many species, within a month there is a new generation of scale. Scale multiply rapidly.
Scale tend to attack epiphytic orchids. Evergreen terrestrial orchids may be affected but not the deciduous ones.
EFFECTS OF NOT TREATING SCALE:
Apart from making the plants look ugly, scale left unchecked can
- infect other plants
- weaken the plant leading to death of the plant
- make the plant worthless for shows
- develop secondary infection of sooty mould
- treating the scale will treat the mould
SCALE PREVENTION:
Inspect and Monitor plants
- check leaves (both upper and underside), crevices, sheaths, pseudobulbs, stems, etc
Quarantine and treat new plants before introducing them to the orchid collection
- newly acquired plant can be a major source of scale infestation
- for thoroughness, use both a contact and systemic spray (see below Types of Sprays)
Preventive spraying
- schedule spraying 2 – 4 times a year
Consider relocating ferns if they are under orchid benches as this can often be a host for brown scale.
Control ants
- If free-standing bench or hanging pots are free of scale and plants are not touching any other surface than applying Vaseline around each of the feet/lower part of the hooks will prevent ants and crawlers from moving into the area.
- Vaseline is waterproof and so will be effective for a long time.
SCALE PREDATORS:
Biological control alone appears to be ineffective but the following is a list of known predators
- Crypotlaemus montrouzieri Native ladybird feed on mealybugs and felt scale
- Mallada signata, Green Lace Wings, feed on aphids, spider mites, various scales, mealybugs, moth eggs and small caterpillars
- Chilocorus beetles
- Aphystis wasp species
TREATMENT:
Scale are hard to eliminate entirely. Vigilance and persistence are important factors in controlling scale.
Treatment works either by
- a direct contact spray whereby the insect is suffocated by smothering. This is effective for all stages of the life cycle but particularly for the adult under its shield.
- an application of a systemic chemical.
- or a combination of both.
For treatment to be effective the leaves (both upper and underside), crevices, sheaths, pseudobulbs, stems must be thoroughly drenched with the spray of choice.
Types of Sprays
Contact Sprays
Whatever type of contact spray used, treat every 2 weeks for three treatments
- Soapy Water (for those who like using home-made remedies)
- Using pure soap (not detergent), suds up a bar in a bowl of water, and pour into a spray bottle.
- Homemade Horticultural Oils
- See ABC Fact Sheet: Horticultural Oils for more details on oils.
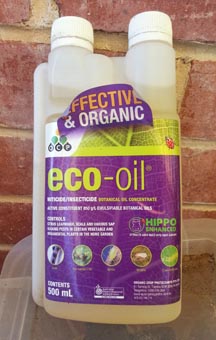
- Eco-Oil (Pest oil)
- No petroleum derivatives; registered organic substance
- Do not spray on very hot days as it can cause burning.
- Always dilute (2.5 mls per 1 litre as per instructions on label), never use neat
- It is important to dilute, as the oil can also block the leaves stomata and so suffocate the plant.
- It is a foliage spray and should not be used on the plant roots.
Chemical Sprays
Whatever chemical spray is used, repeat within 4 weeks of the initial treatment and then as often as necessary.
Ideally, it is best to use multiple systemic sprays to avoid the scale becoming resistant to the chemical.
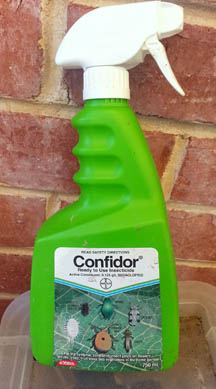
- Confidor
- Active ingredient Imidacloprid, an insect neurotoxin, is absorbed by the plant and then ingested by the insect
- low toxicity to humans and pets
- but use heavier drenching rather than fine mist to avoid inhalation
- Effective for about 2 – 3 weeks
- broken down by light so remains in pots and soils for awhile
- Follow manufacturer’s instructions at the minimum recommended strength.
- Defender
- Active ingredient acetamiprid
- Low toxicity to bees (although bees are not usually a problem in an orchid house)
- Fipronil
- High toxicity
- Harder to obtain
- 80 – 95% kill rate for slugs and snails
NB: Do not use the contact and chemical spray at the same time
- Wait a week between using the different types of sprays.
- Spraying too soon will negate the effects of the first spray.
Additional Treatment
Despite what application is used, all need the following treatment
Rub the scale off taking care not to damage the leaves
- Use either toothpick, fingernail, toothbrush or cloth/tissue
- Rubbing the scale off allows for
- detection of new infestations
- eggs under the shield to be killed
Thoroughly disinfect any recycled pots
Dispose of all debris as eggs and scale can survive for weeks and reinfect the plants
REFERENCES:
Oliver D, Scale and its Control Oliver, Orchid Societies Council of Victoria, http://www.oscov.asn.au/articles3/scale.htm accessed 5/1/17
Johnson PJ, Scale, Orchids – The Bulletin of the American Orchid Society, September 2003, http://www.aos.org/orchids/orchid-pests-diseases/scale.aspx accessed 5/1/17
Manners A, Scale Insects: A difficult problem that can be managed, 2015, Agri-science Queensland, Department of Agriculture and Fisheries https://www.ngia.com.au/Category?Action=View&Category_id=682 accessed 5/1/17
Imidacloprid https://en.wikipedia.org/wiki/Imidacloprid accessed 5/1/17
Eco-Oil http://ecoorganicgarden.com.au/products/pest-disease/eco-oil/ accessed 7/1/17
Les Nesbitt, NOSSA, pers comm
Kris Kopicki, NOSSA, pers comm
Richard Austin, ANOS Vic, pers comm
Gleanings From the Journal: Rescuing apparently ‘dead’ orchids Parts 2 & 3 of Three Parts
This week we continue with both Part Two and Part Three of Brendan Killen’s Rescuing Apparently ‘Dead’ Orchids which appeared in the Volume 31 No 9 October 2007 and Volume 31 Bi 11 December 2007, respectively.
Rescuing apparently ‘dead’ orchids. Part 2 By Brendan Killen
PLANT #2 – Dendrobium Alick Dockrill “Pale Face”
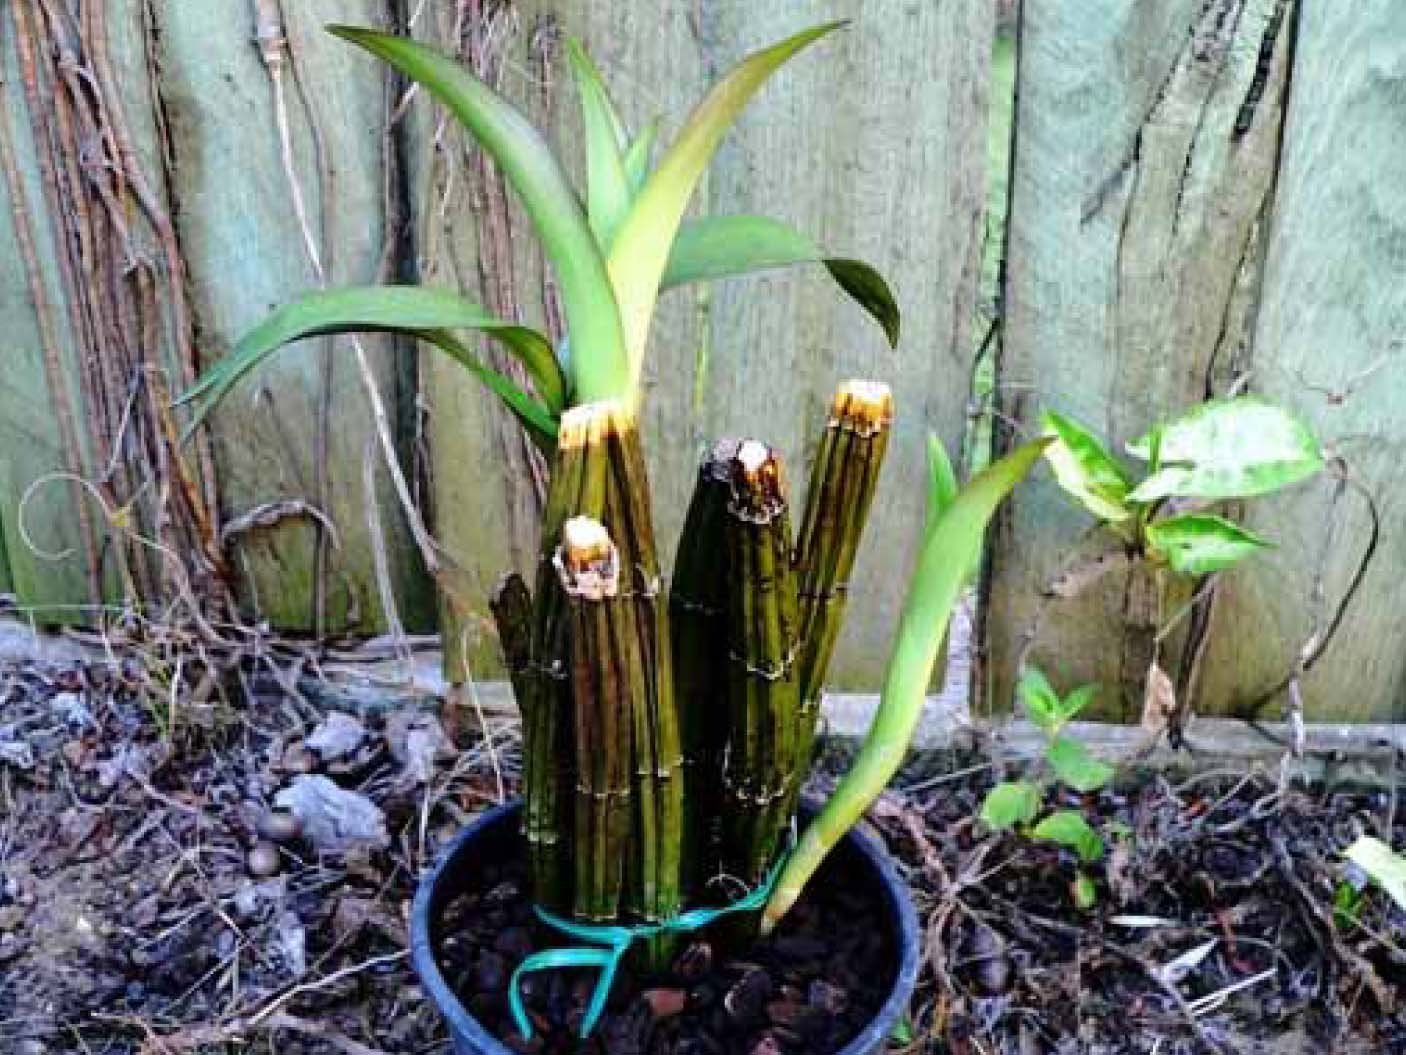
The cane pieces of this plant were inserted into a bark mix at the same time as the canes of Den. Jayden ‘JANE’ [See the July Journal] were inserted into sphagnum moss. The outcome is three healthy growths.
Note the dried ends of the canes where they were cut into separate pieces. As you can see from the photograph, I used a green twisty to hold the canes in the bark as a fairly solid bunch – I find this is the best way to keep the canes still whilst they are developing sensitive new growths. I have found that no matter how bunched-up the canes are, the new growths always find a way to the surface.
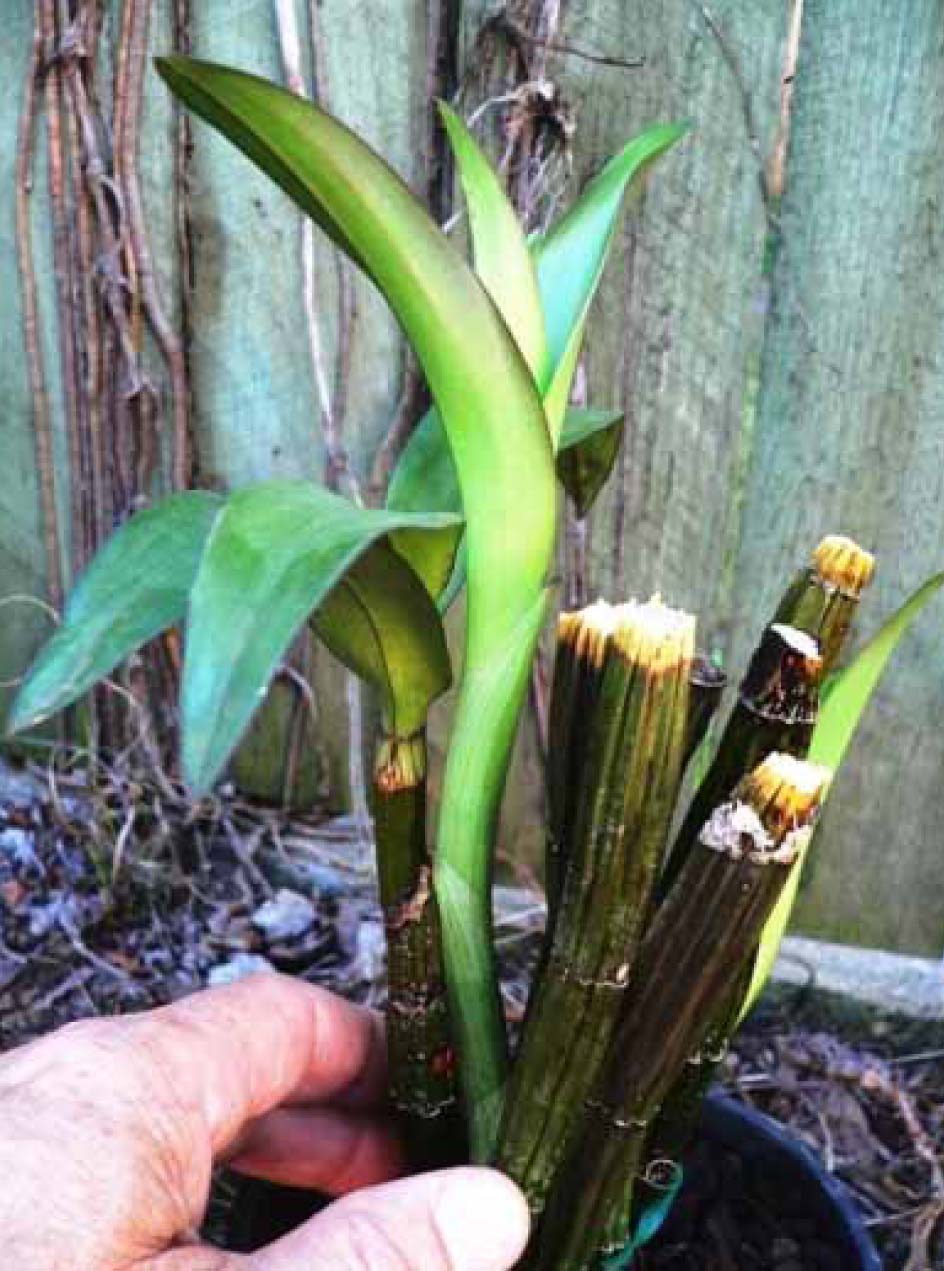
Here is a different angle on the new growths with my fingers providing some perspective on the size of the growths.
Note that they are significantly larger that those on the Den Jayden ‘JANE’, with the same time in the pots.
I do not consider this evidence of the worth of bark compared to sphagnum moss.
I find that different hybrids and species behave quite differently in terms of their speed and timing of production of new growths. I believe that it is a function of what species are in the background of these plants and the time of year the rescue is undertaken.
Here is the same plant 5 weeks later. The new roots are protruding from the pot and the new growths are extending themselves – all of this at a time where severe water restrictions limit me to two waterings each week by watering can!


A further 4 weeks of cultivation and bright, warm weather has fully extended and hardened the new growths.
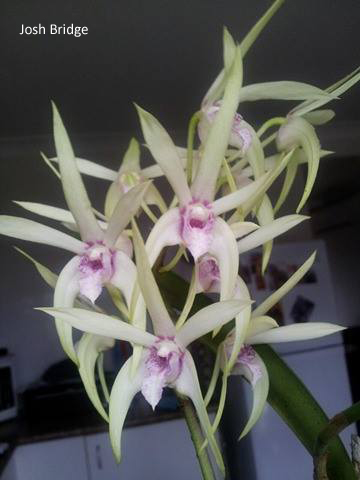
The larger growth should produce a flower spike this Spring.


Dendrobium Alick Docrill “Pale Face” (Photographer: Josh Bridge)
TO BE CONTINUED
*********************
Rescuing apparently ‘dead’ orchids. Part 3
By Brendan Killen
Plant #3 – Dendrobium Sarah Jane ‘Purvis’
This is a plant that the late John Purvis gave me just before he passed away. Because it is a special plant to me, I cut an old cane into three pieces to produce a back-up plant, just in case my piece of the original fell foul of the orchid gremlins.

As you can see, it is the least developed of the three plants featured in this article. And yet, the parent plant has produced two magnificent new growths in the same period. I feel that the 12.5% of Den. bigibbum and 12.5% of the hot growing Den. tetragonum var. giganteum have influenced this. This new growth has probably been encouraged since the relocation from Adelaide to Brisbane where the temperature differences overnight are more subtle than in the Adelaide Hills where the plants were previously cultivated. The two hot growing species in the plant’s background were probably held back by Adelaide’s much cooler overnight temperatures. Anyway, this is purely conjecture on my behalf. What is important is that I now have a developing back-up plant for one that I treasure dearly.


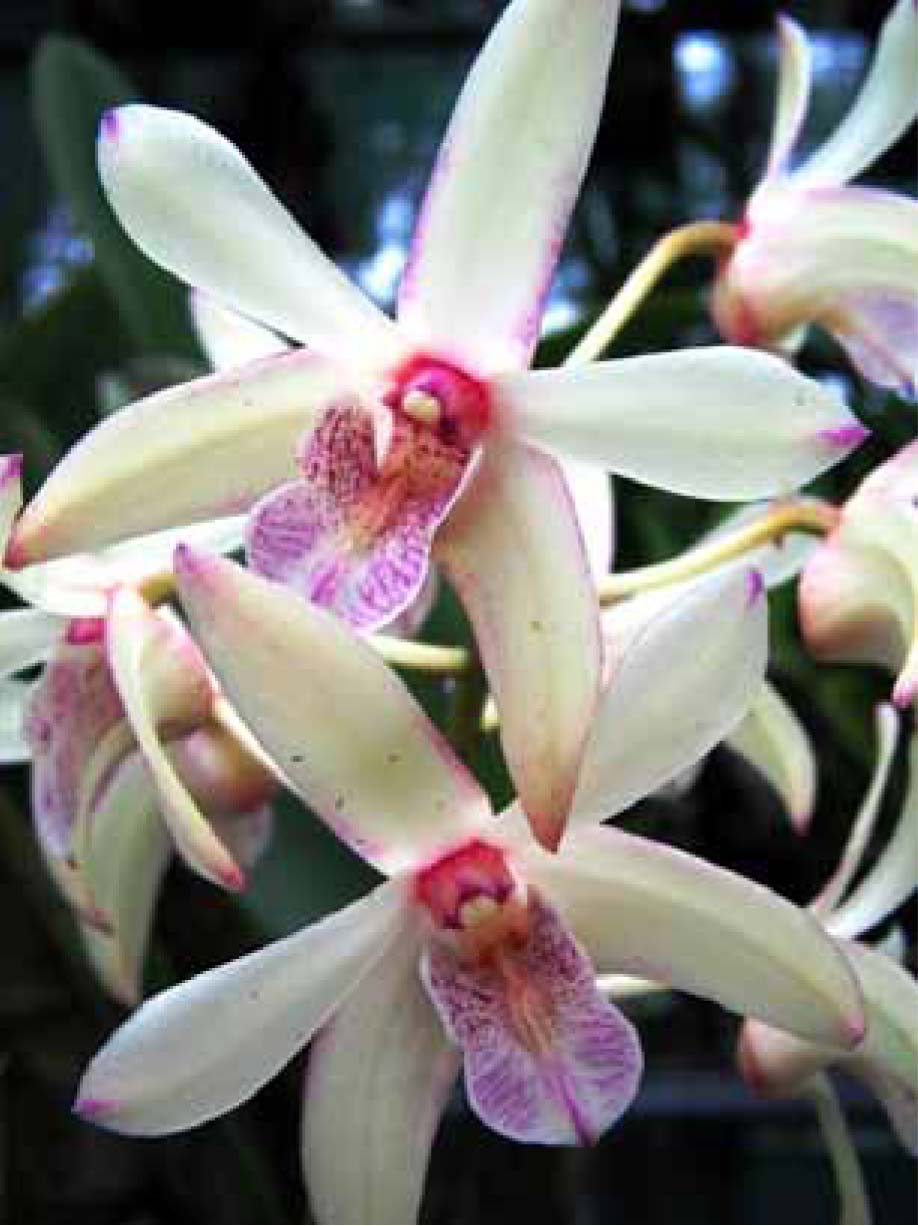
Dendrobium Sarah Jane ‘Purvis’ (Photographer Josh Bridge)
SUMMARY
The thrust of what I have written is simple – don’t give up on treasured plants that look like they have expired, because there is always hope so long as the canes haven’t turned into fermented mush! The technique is as simple as cutting canes into lengths where you have at least three, preferably four, segments from which new growths will materialise. Use sterilized cutting tools to avoid contamination of the canes. Once the new growths have emerged, give them time to produce healthy root systems and let the new canes harden before potting-on. The best time I have found to pot-on the new growths is early autumn.
****************
Thank you to Josh Bridge for supplying images of the flowers of Dendrobium Alick Dockrill “Pale Face” and Dendrobium Sarah Jane ‘Purvis’ as they were not in the original articles.
***************
Another technique demonstrated by John Gay at one of the NOSSA meetings a couple of years ago was to take the apparently dead canes of an epiphytic orchid and seal them in a plastic bag with a small piece of damp sponge (or other cloth) and leave them in the shadehouse. Do not let the sponge dry out. So long as there was a bit of moisture, there was a chance for new growth on the shrivelled canes. Once the growth was obvious, pot on as normal.
GLEANINGS FROM THE JOURNALS: Part 1 of 3 parts Rescuing apparently ‘dead’ orchids
The following is part of a three part series on reviving apparently dead epiphytic orchids from Volume 31 No6 July 2007
Rescuing Apparently ‘dead’ Orchids
By Brendan Killen
In late Spring 2006, I had an ‘open shade house’ event at my place in Belair, South Australia. As part of the programme, I demonstrated how I rescue orchids that have all but died. My demonstration was based on many years of experience in not giving in to the demons that cause orchids to expire.
I used two orchids that everyone attending agreed would normally be tossed into the rubbish bin or compost – all bare canes; heavily shrivelled; all new growth ‘eyes’ at the base of the canes chewed out by insects. In other words, an apparently hopeless situation. I’ve never given up on these terminal plants, believing that they still had life in the old canes along as they hadn’t turned to fermented mush.
I also used an apparently ‘dead’ cane from a treasured orchid that I was hoping would eventually produce a back-up plant using the method I describe in the following text.
In one case (Dendrobium Jayden), I cut the canes into a number of segments and stuck them into a pot with heavily compressed sphagnum moss, topped with river gravel to suppress the moss from growing and overtaking the pot. In the other two cases (Den. Alick Dockrill & Den. Sarah Jane), I cut the canes into segments and placed them in a pot of small composted bark.
The following photographs were taken about 3 months after the repotting demonstration and after the plants were relocated to Brisbane. They demonstrate the benefit of the right technique and a ‘don’t give up’ attitude. This technique has not failed me yet, allowing me to rescue many prized plants that have gone on to be show-bench winners.
PLANT #1 – Dendrobium Jayden “Jane”.
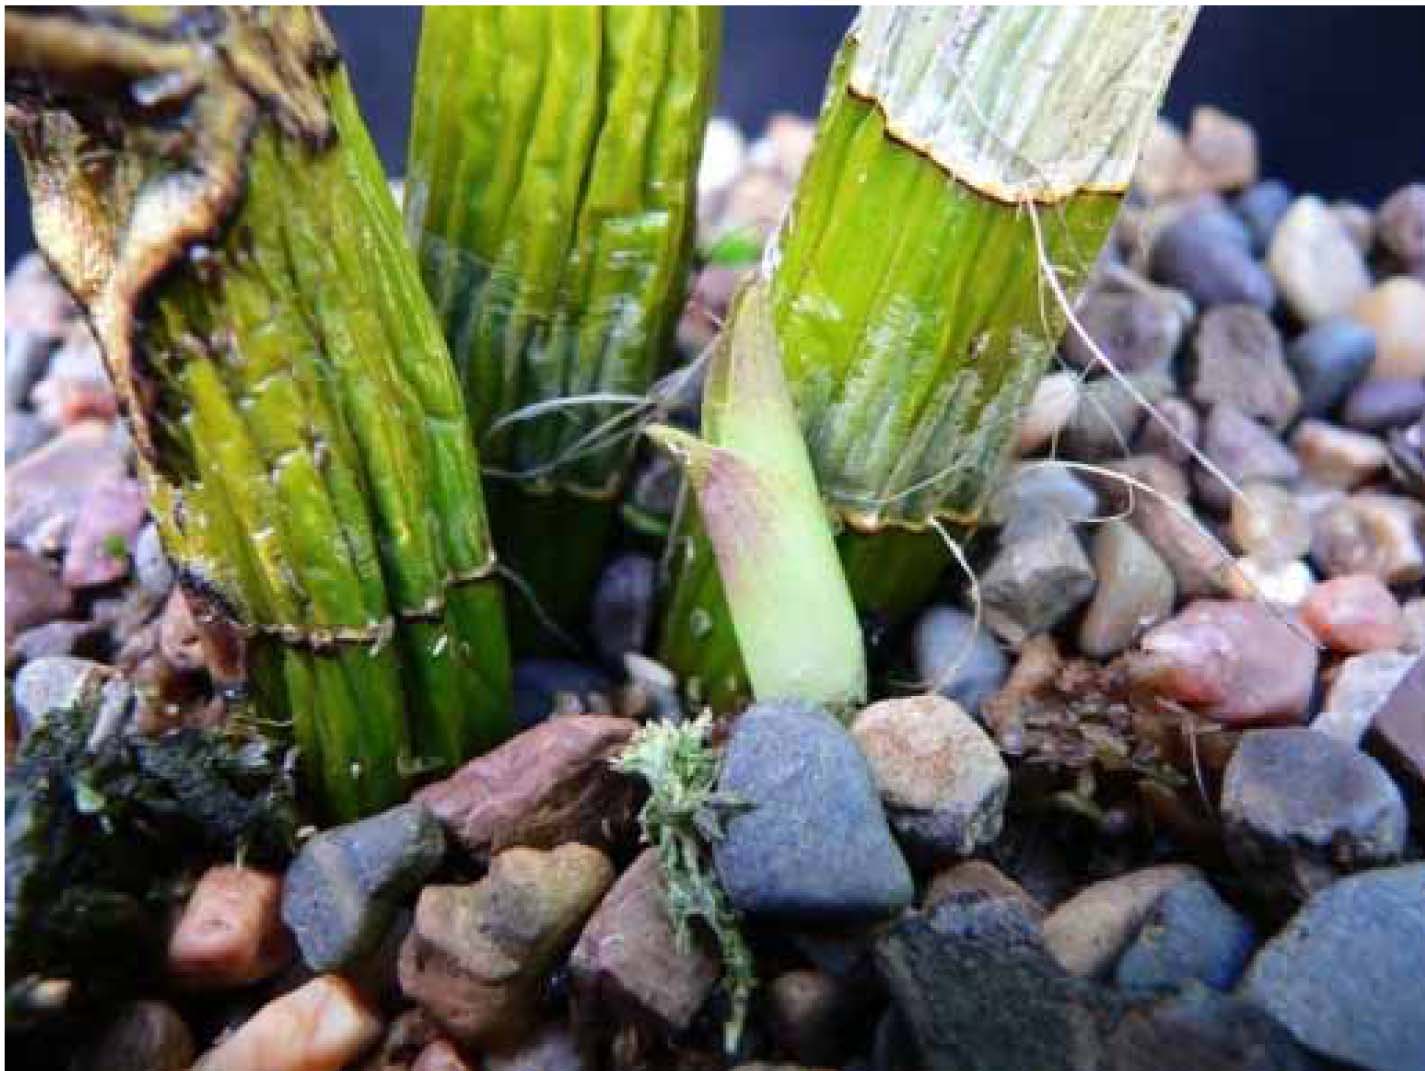
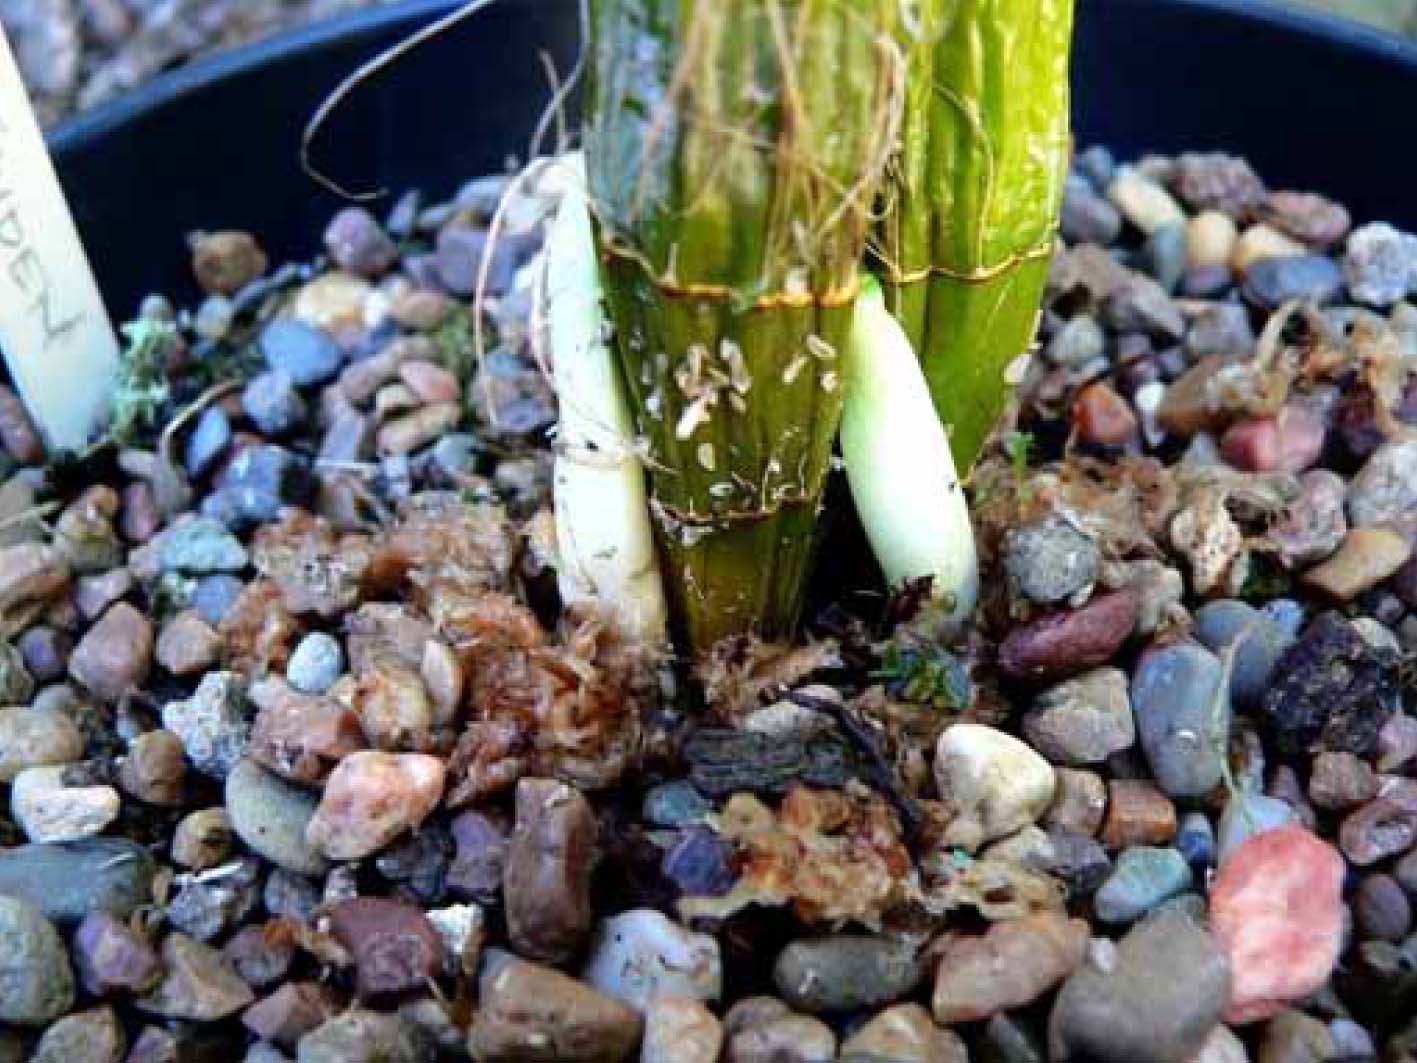
This photo illustrates the emerging new growth on a Den. Jayden “Jane”. This is the first evidence that success is at hand. It is also the first new growth discovered on this plant before I inspect the canes further to see if there are any other new growths buried within the sphagnum moss.
In this photo, you can see that the new growth is very pale from having emerged from deep in the sphagnum moss with little exposure to light. The juvenile roots can be seen emerging on the right hand side.
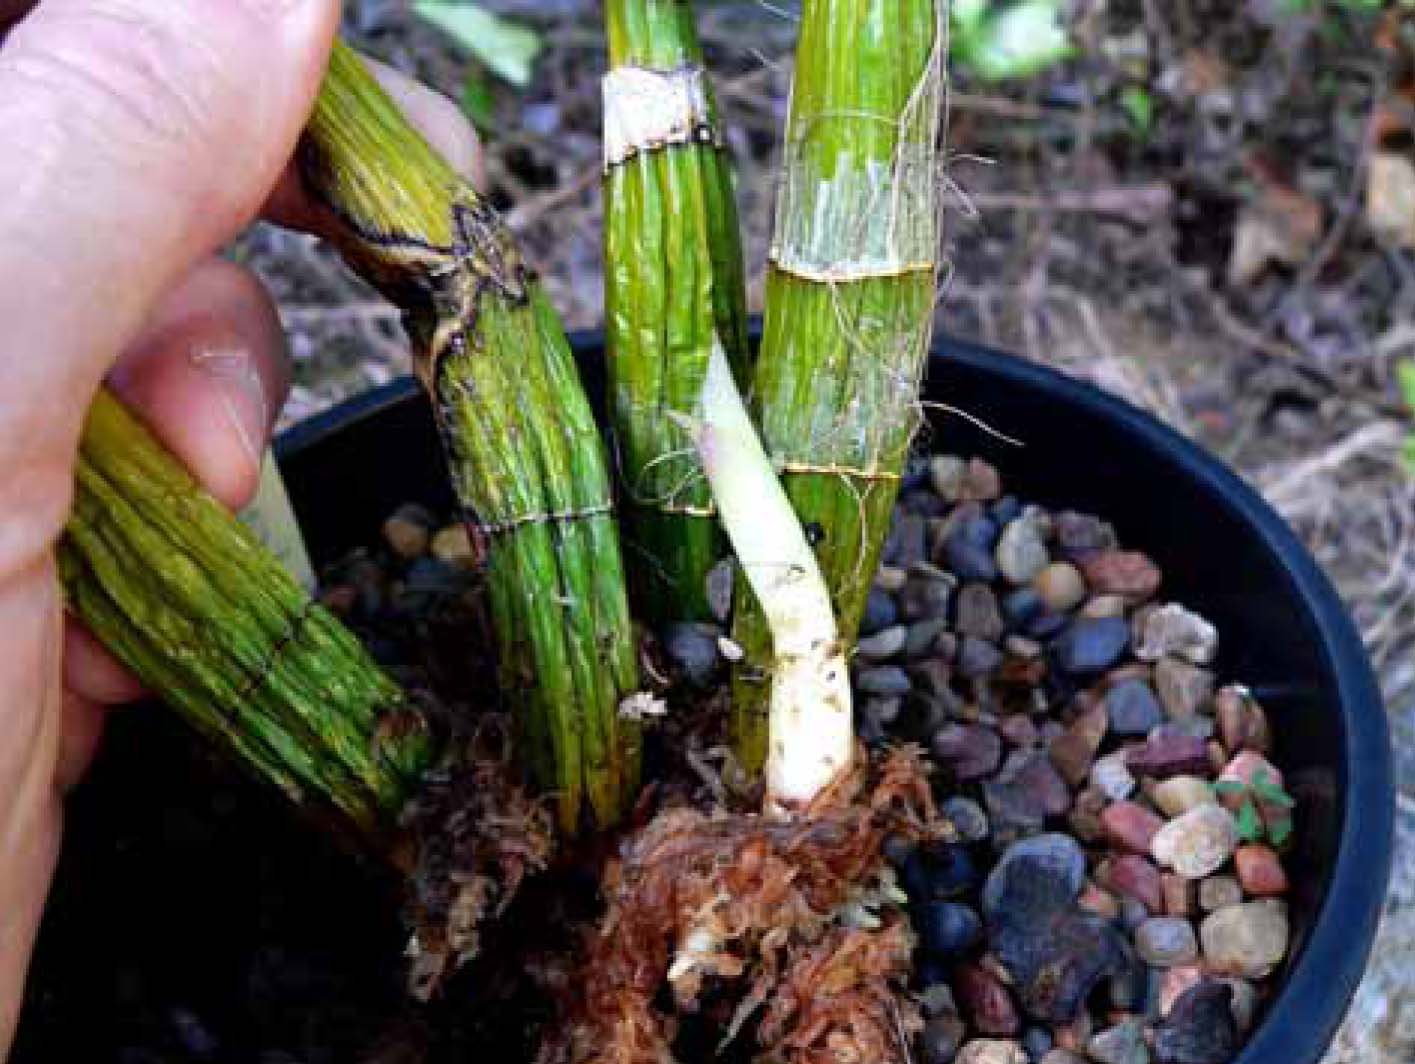
A closer inspection reveals another growth, on the other side. Note that both growths are not coming from the ‘eyes’ at the bottom of the canes – simply because they were cut off at potting time. They are emerging from the section that joins the cane segments.
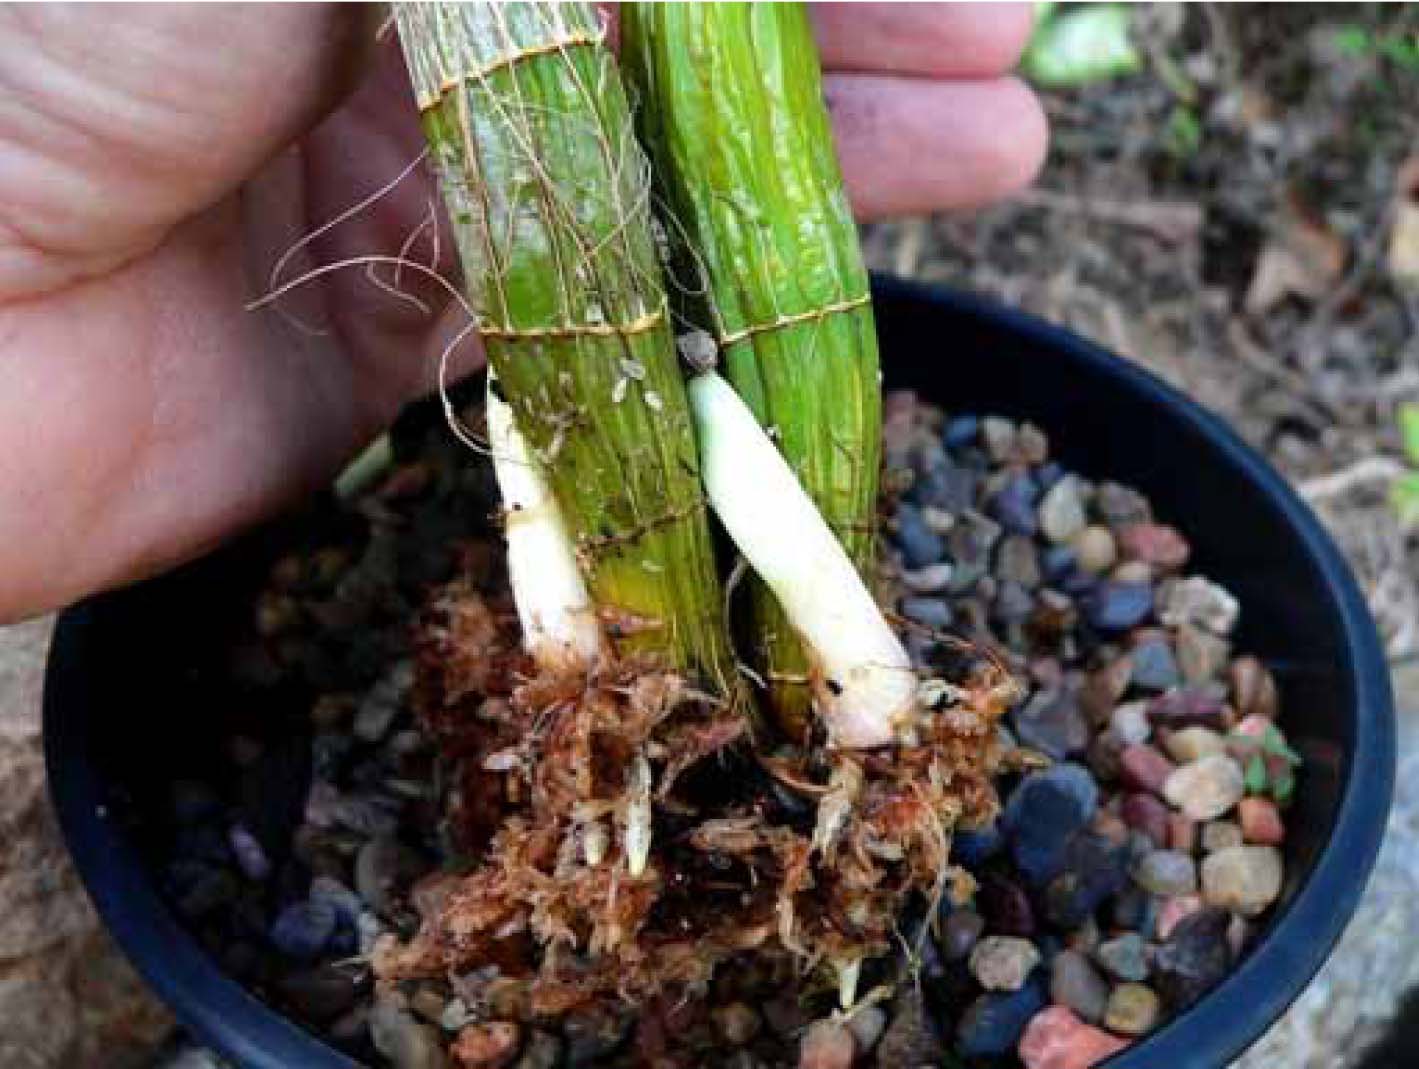
Teasing away the sphagnum moss reveals even more of the young roots. Note how the new growths are lacking any colour substance at this stage.
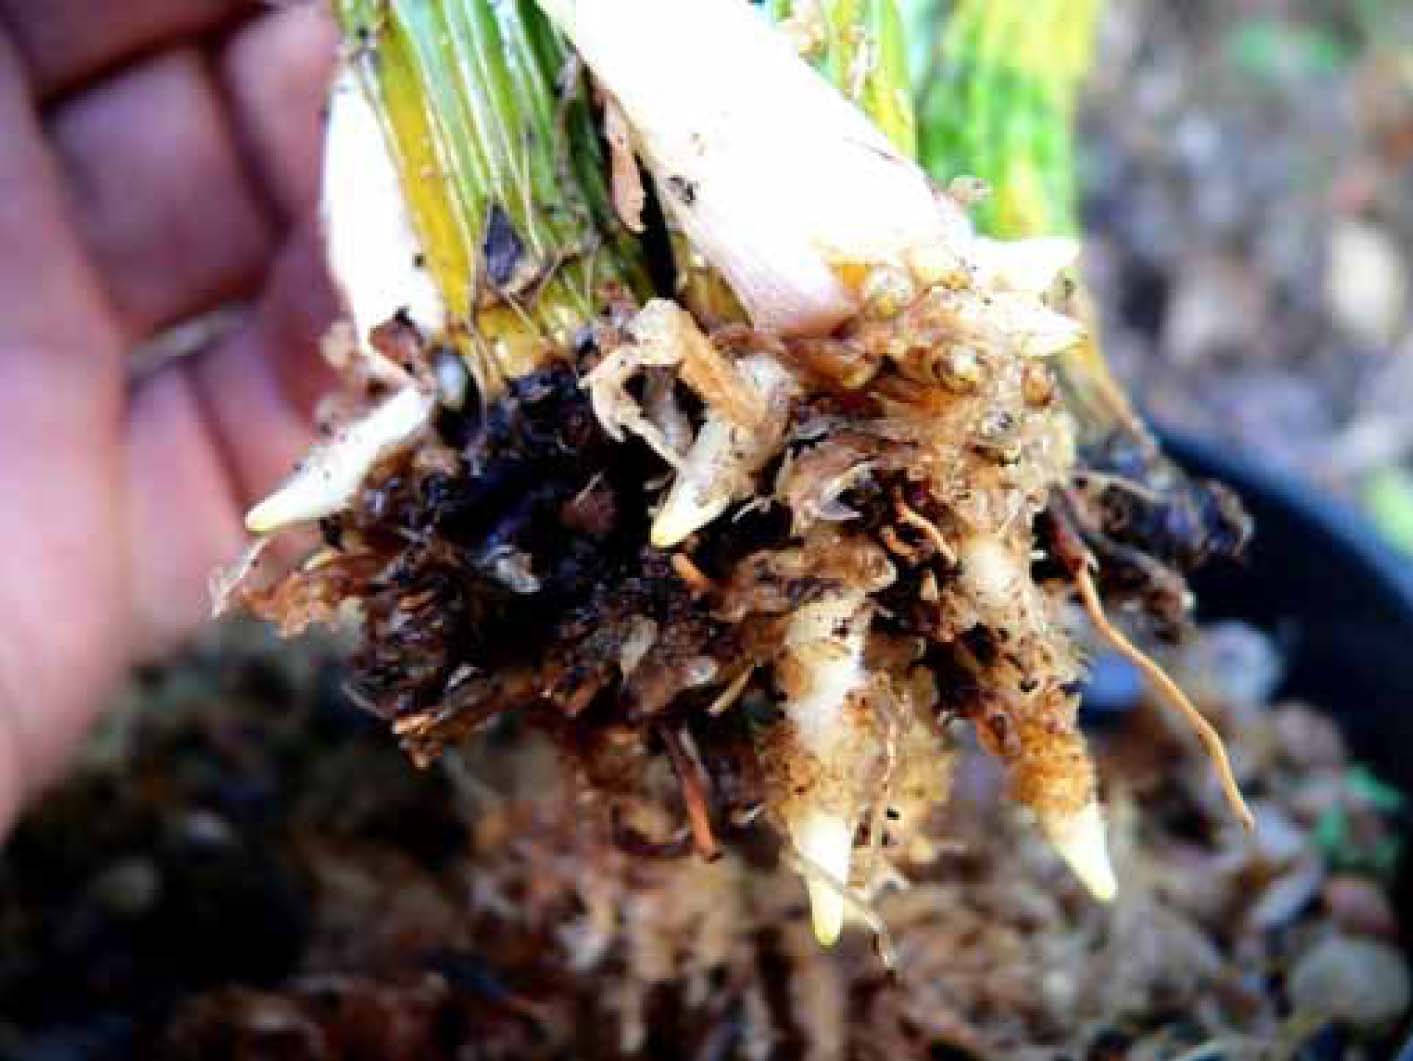
If I were to ignore this plant for much longer, the new growths would have rotted in the very moist sphagnum moss, neutralising my efforts. So, the lesson here is to ensure that you monitor the plants for new growths and ensure that you elevate the new growths above the sphagnum moss to give them a chance to ‘harden off’ from their immersion deeper in the sphagnum.
This photo illustrates how I have re-seated the canes within the sphagnum moss, but much higher so that only the roots are exposed to the heavy moisture content of the moss. I choose to do this instead of placing them straight into a bark mix as I find that the plants tend to go into a shock at the relative lack of moisture in bark and can die quickly, or suffer from stunted growth. I wait until the new growths have matured with substantial green substance before I repot them in a bark mix. And, I tend to do this in late autumn when they are not under any temperature or light stress. By spring, they will be racing ahead in the bark mix with new root growth and, possibly new canes and/or flower spikes.
One Month Later……….
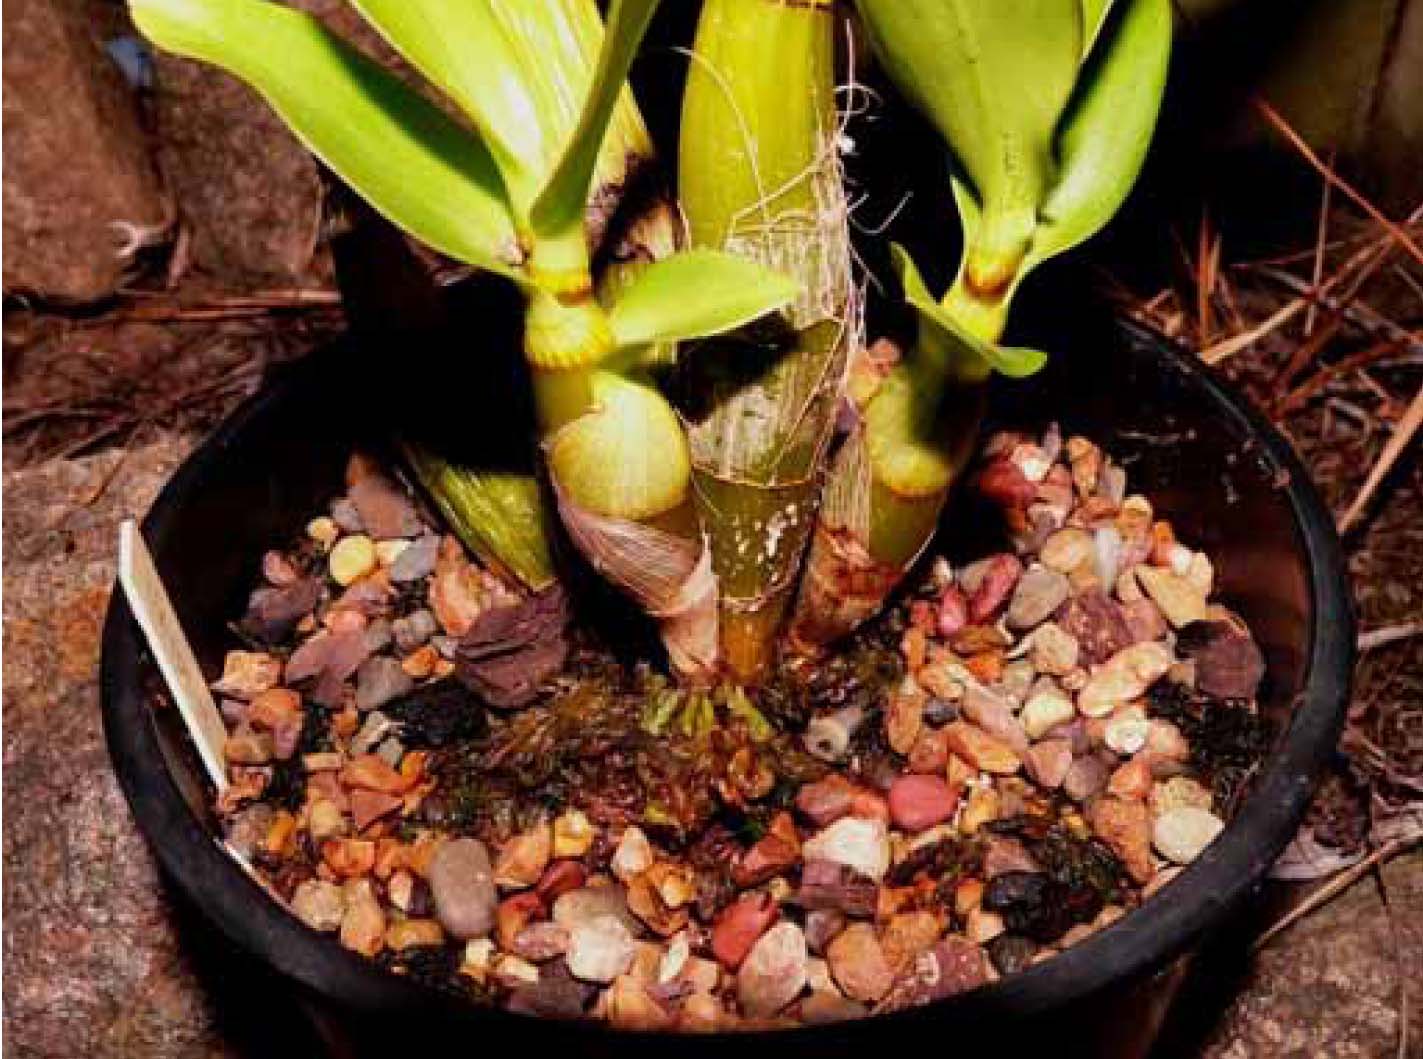
After one month from the re-seating described previously, note that the pale new growth is now mature and bright green. And, note how the roots are emerging from the growth above the sphagnum moss. This plant will be ready for potting-on into a bark medium in the next few weeks as autumn cools the air in Brisbane.
This is how I expect it to flower in spring
TO BE CONTINUED …..
