Since orchids, and Australian orchids in particular, first came to the attention of the western world in the 1800s researchers have been fascinated by the so many different aspects of the orchid’s morphology and life cycle. One area of interest has been that of how orchids are pollinated. The mechanism of pollination has not always been clear as the orchids seem to use different and complex methods. From time to time various papers have been published of observations by researchers.
The ‘question and answer’ style of the paper helps with ease of reading and is worthwhile perusing, even for the lay person. The accompanying VIDEO is also of interest.
The essence of the paper was to establish whether sexual deception was used to facilitate pollination. The species researched was Pterostylis sanguinea (syn. Urochilus sanguineus) and the researchers confirmed that this did happen. Their research showed that the attraction for the insect came only from the labellum which exuded an alluring chemical. P. sanguinea has a mobile hinged labellum which is a feature of other sexually deceptive orchids such Paracaleana,Caleana,Arachnorchis.
Pterostylis sanguinea syn. Urochilus sanguineus with the untriggered labellumPterostylis sanginea syn. Urochilus sangineus with a side view of the labellum
A general medical practitioner of Cloncurry and Canungra (Queensland); the orchid that bears his name was collected from a single colony discovered in 1934 and is now almost certainly extinct.
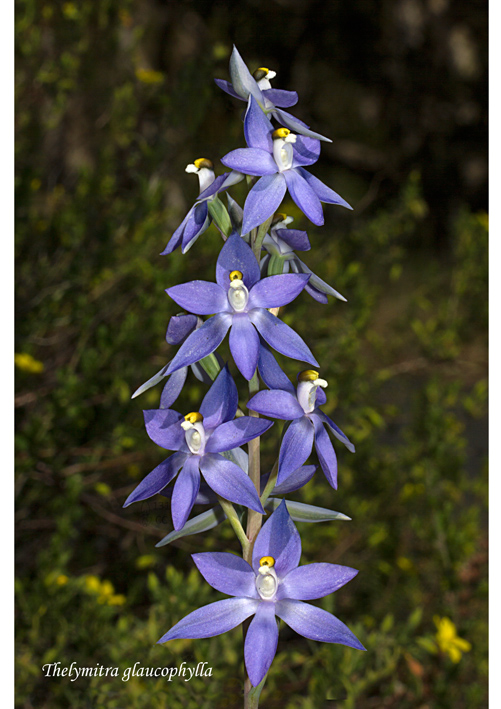
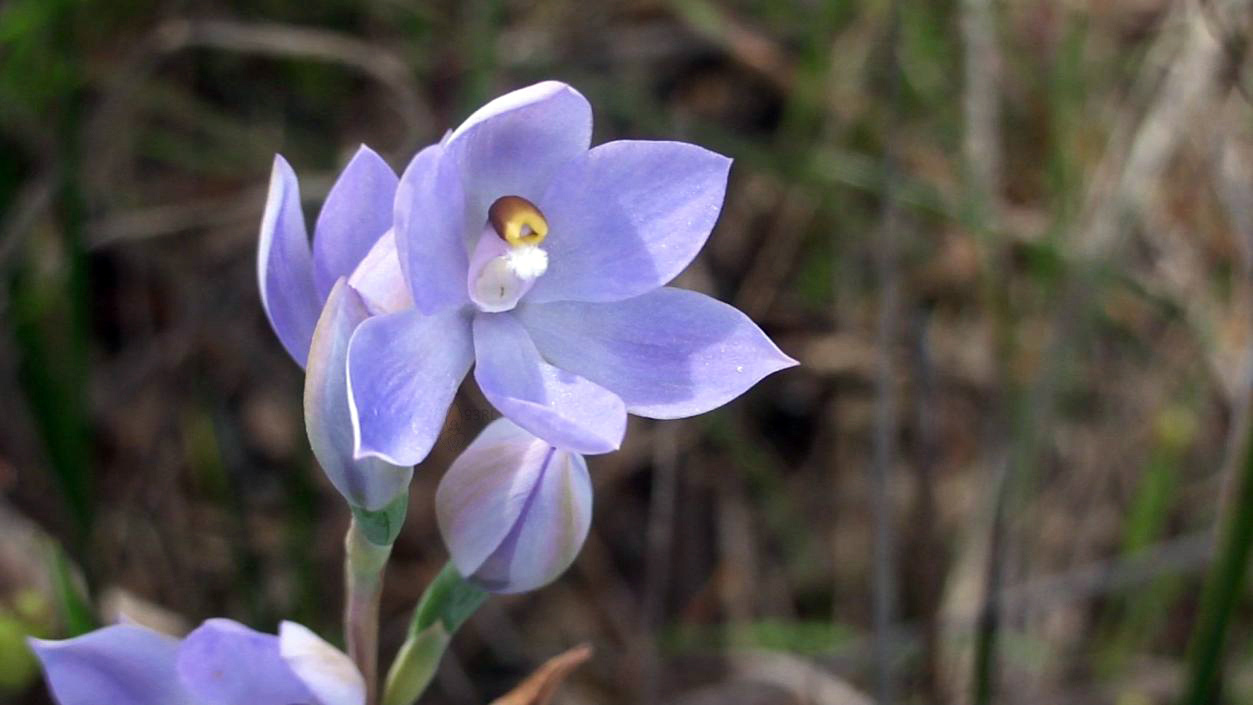
The number of photographs may have been few but the quality was present. The clear winner was Claire Chesson’s Thelymitra glaucophylla (Glaucous Leaf Sun Orchid). Flowering from October to December, this endemic grassy woodland species of the ranges was only published in 2013 by Jeff Jeanes in the Mulleria 31:3 – 30 (2013) but it had been recognized much earlier by Bob Bates and has appeared with this name in his electronic Orchids of South Australia since 2005. It belongs to the T. nuda complex, of which there are 15 species, six of them having only been published in 2013. This complex is characterised by having large scented blue multiple flowers that open freely.
Not seen in this picture is the leaf and though the leaf is highly variable – 10-50cm long, 8-20mm wide, erect and short, long and flaccid, Jeanes mentions that T. glaucophylla “can be identified with a high degree of confidence from the mature leaves alone” (Page 4 Vol 31, 2013 Mulleria). The main features of the leaf are grey-green glaucous ie white bloom and is often senescent (withered) at anthesis (full flowered). Of the T. nuda complex, T. megcalyptra is the most similar but its leaf is never glaucous and has a red base, as well as an earlier flowering time and habitat of plains and rock outcrops.
For more details on the other orchids in the T. nuda group see the post titled Those Blue Orchids Again …posted 30th January 2015 with the link to Jeanes article in the Muelleria
In 1984, G.J.Nieuwenhoven was the editor of the NOSSA Journal. In February of that year he wrote the following:
Welcome back to NOSSA.
After the holiday break we are all looking forward to the next meeting to talk about our favourite plants and renew friendships.
Several members have reported an early start to the terrestrial season with Pterostylis species, a couple of Diuris species popping up already. For some of the eastern states Pterostylis of the cauline group this is normal, especially if you keep the pots cool during the summer (a cellar is ideal but underneath a shaded bench in the shadehouse will do nicely). Very light watering should take place when the first shoots appear but do not overdo the watering or place pots in the sun for we are sure to get some more hot weather yet and this could cook your plants before you know it.
The Diuris are really out of season but it was probably the rain in late December and early January that started them off, anyway, these too should be kept slightly damp if they are up.
If you have not finished repotting by now it would be best to leave it until next year as the new shoots which are already beginning to grow from the tubers are very easily broken off while sifting them from the soil.
Apart from that all you can do is wait for the rains to come in March and then start searching for plants to appear – and keep those fingers out of the pots or you may damage one of your best plants looking for the new growths.
This is also the time to start taking notes when plants first appear, etc.:
when they flower and how many flowers from a given number of tubers;
what kind of soil; what conditions (i.e. shaded or not, damp or dry).
Anything that may assist in years to come to help you understand and grow our orchids better and, more importantly, multiply them.
A card index system would be a good way to store information, otherwise an exercise book will do.
Editor
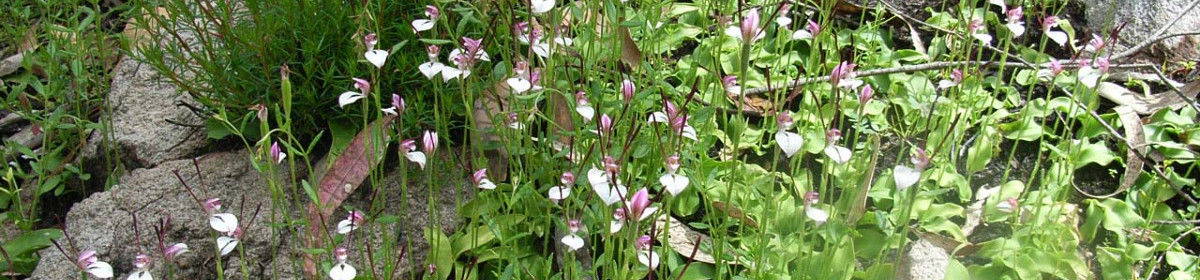
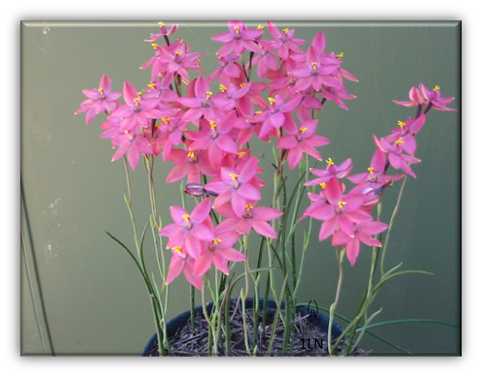
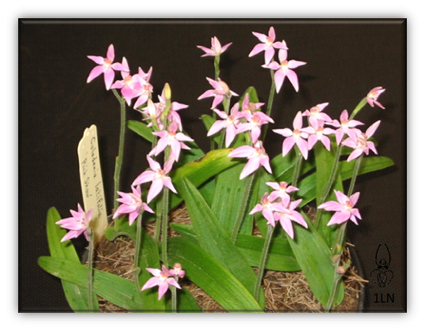
The timing of the article tallies with the advice that was recently given at the end of February – start watering the terrestrials now if you haven’t already begun. Hopefully by the flowering time you will have a lovely display of terrestrials such as the Thelymitra, Arachnorchis and Caladenia featured below.
A navy surgeon who later worked as general medical practitioner, ecologist and conservationist in Noosa (Queensland), and graduate of the University of Cambridge; he formed the Noosa Parks Association in 1962 and helped establish the Cooloola National Park.
Orchid
Habenaria harroldii
Named in recent years, so there is only general information on the genus, Habenaria
Part Two of the November competition consisted of photographs of insects on orchids. There was quite a range of insects but the winner was a draw between Cyrtostylis robusta (Winter Gnat Orchid) with an ant and Pterostylis curta (Blunt Greenhood) with a midge fly; both taken by Doug Castle.
With today’s technology it is not only easier to take crisp images but fine details can be seen particularly when enlarging the image. Hence when the pictures are enlarged it is possible to see hairs on the ant and feathered antennae on the midge fly.
With identifying orchids, it is often the detail that is important. Both of these orchids are distinctive and can be readily identified but it is good to examine why this is the case.
Pterostylis curta (Blunt Greenhood)
With the greenhood, there is enough detail to see that the dorsal sepal and lateral petals have united to form a galea, ie hood, and that the lateral sepals are semi-fused and erect resulting in lateral orifices (side gap) between the two structures. These are some of the features that separate Pterostylis* from the other greenhoods such as Diplodium, Speculantha and Taurantha. This becomes apparent when browsing through the greenhood photographs, pages 286 to 339, in Jones “A Complete Guide to Native Orchids of Australia”. Having established that the plant is a Pterostylis, the twisted labellum is diagnostic of a P.curta as it is the only one that is described with a twisted labellum. Although not all the identifying features are present, enough information is available in this picture for identification.
In contrast the photograph of the Cyrtostylis robusta only has sufficient data to confidently identify it as a Cyrtostylis species, having a distinctive labellum that is larger than the lateral sepals and petals. In South Australia there are only two species and according to Bates (2011), the distinguishing features between the two
Cyrtostylis robusta (Winter Gnat Orchid)
appear to be the leaf, the bud and the labellum. In this picture, the angle of the image does not give a clear view of the labellum (it could possibly be damaged) and of course there is no bud or leaf. It is possible that the pale edges of the dorsal sepal may give a clue to species identification as C. reniformis has mainly darker buds than C. robusta. Obviously Doug was able to identify it from his observations of the other features not present in this photograph.
In summary, one image is not always sufficient for identification. As was discussed on the night, to confirm identification, orchids should always be photographed from more than one angle, including pictures of other parts of the plant.
*In South Australia, Pterostylis foliata is a possible exception as it has no obvious lateral orifice.
References
Jones, D.L., T. Hopley, S.M. Duffy, K.J. Richards, M.A. Clements & X. Zhang (2006) Australian orchid genera. An information and identification system. CSIRO Publishing: Collingwood, Vic.
Bates, R.J. (2011) South Australia’s Native Orchids. DVD-ROM. Native Orchid Society of South Australia Inc.: Adelaide.
Jones, D.L. (2006) A complete guide to native orchids of Australia, including the island territories. New Holland Publishers: Sydney.
A pioneer Australian radiotherapist, radiologist, general medical practitioner and toxicologist of Cairns (Queensland) who dug his own radioactive ore at Radium Hill (South Australia), a medical graduate from the University of Sydney, and a natural historian; his life and works are commemorated by the Flecker Botanic Gardens in Cairns.
By way of introduction, Muelleria is the Royal Botanic Gardens of Melbourne official research journal and has been published since 1955.
Though a technical article there is much to be gleaned for the ordinary reader, for instance the article contains a good description of the commonly used terms for describing the column for example stigma, trichomes, anther, post anther lobe, etc. This is helpful to know as the column structure is often the main feature of the plant used to identify the individual species. Naturally the key features of the T. nuda complex are covered comprehensively, as well as a brief discussion of the taxonomic history.
Another helpful section is the dichotomous key for all fifteen species described in the article. Of the fifteen species four are found in South Australia and are pictured below. But to discover more read the article ……
Thelymitra nudaThelymitra megcalyptraThelymitra glaucophylla photographed by Robert BatesThelymitra alcockiae
Attempting to divide a large Dendrobium taberi (Dendrobium speciosum var. hillii or Thelychiton tarberi) for the first time can be daunting but with a little instruction and guidance it is not quite as hard as it seems. If left, these plants just get bigger and bigger ……
… and if you would like to see a magnificent one that’s in flower, click here.
Here is my first time attempt at dividing a Dendrobium tarberi.
First the pot was allowed to dry out a bit – no watering in the days before.
A drier plant is easier to divide.
All the necessary equipment was assembled before starting
Assembled equipment including Snail repellent, Bleach for cleaning pots & equipment, wettable sulphur for putting on the fresh cuts
All equipment to be used was disinfected.
For though tough, the plants will be placed under stress making them vulnerable to the risk of infection.
The pots were washed in bleach as per instructions on the container, including the wearing of gloves.
The plant was removed from the pot by
by giving the pot some good knocks with a mallet. This loosened the plant and made it easier to remove without damaging the pot
and then it was given a good shake to remove the loose potting mix
Next the plant was examined for areas of natural cleavage which were then pulled apart.
This is the place to start dividing the plant.
The plant was still quite big so then tried using a mallet to try and loosen the plant and find more natural cleavages but wasn’t successful
The whole plant was picked up and dropped from chest height several times
This finally caused the plant to split
As the plant started separating two techniques were employed
These plants are tough – no need to use kid gloves
An axe and mallet were used to lever the larger divisions
Smaller divisions were twisted by hand
Throughout the process old roots were pulled off or cut away
Old roots are soft, spongy and dirty looking
New roots were white and firm to touch – see photograph above
Once the initial canes were divided they were examined for further division This decision can be a case of personal preference.
In the picture below this section could have been split in half but it was decided to leave as one piece
Next the split canes were well dusted with wettable sulphur
To make this easier the sulphur was put into a stocking and used like a powder puff
Before commencing the potting on, many of the dried white sheathes on the canes were removed
This can be a source of stagnant water collection resulting in rotting or infection
Finally it came to potting on. A mixture of two types of orchid potting mix was used – Orchid Mix with fertilizer and Orchid mix with 8 – 18 mm bark
The reason was that the mixture needs to be open to allow air movement. Normal potting mix would be too compact. Dendrobium are epiphytes not terrestrials but they can be grown in pots.
The canes were placed upright in the pot and the mix placed around.
As these are heavy plants, stakes were used to secure the canes upright
Each plant was then labelled
An important process so as to not get them confused with other plants – many can look similar
The name and date were written on lollypop stick
Finally the pots were given a light fertilizer, less than a teaspoon, and watering, then sprayed with Escar-go, a copper spray a snail and slug repellent.
Other grower may do things a little different from what is describe here but this is the method that was shown to us.
Lesson – breaking up is easy to do even if it is hard work, but worthwhile hard work.
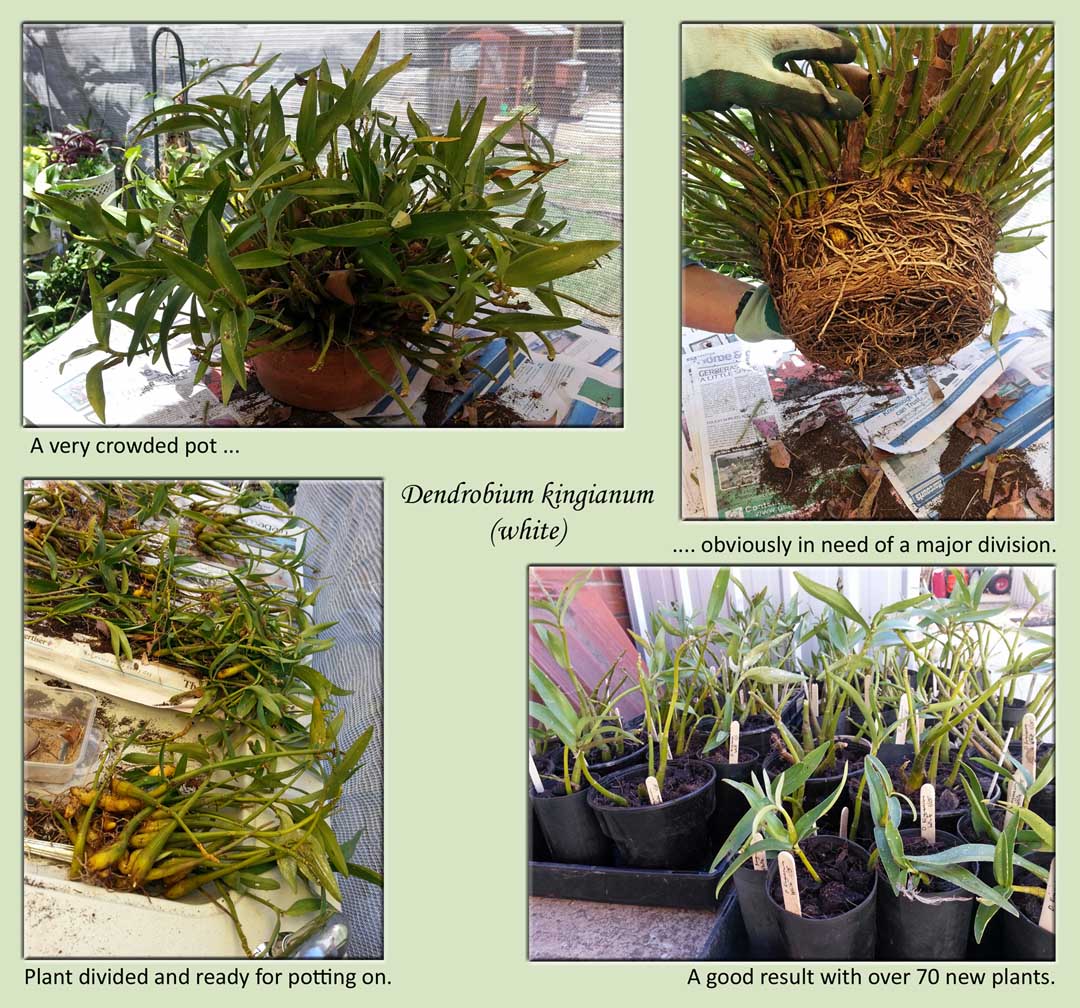
The finished product – lots of lovely new plants!
PS – It did take three of us to do the one pot and so I would like to thank Jan and Sandra for their help.
PPS – Encouraged by how easy it was to do, the following week two of us divided two other Dendrobium – D. speciosum and D. kingianum (white) but we only took pictures of the D. kingianum and to see what it will look like when it flowers, click here.